Setting up persistent NFS mount via fstab
Providing storage to your Linux system is a common practice to separate storage from the computing unit. By utilizing a Synology 2-Bay NAS with RAID 1, you can ensure that your important data is secure and easily accessible. This setup not only offers redundancy but also allows for flexible sharing options across different Linux systems.
To implement this, I will create a new shared folder and make it accessible via NFS (Network File System).
NFS
NFS (Network File System) is a distributed file system protocol that enables users and systems to access files over a network as if they were stored on a local machine. NFS is commonly used in Linux/Unix-based environments and is typically easier to set up compared to SMB (Server Message Block). One of its key features is that, once an NFS share is mounted, it becomes accessible system-wide to all users on the client machine.
NFS operates on server-client model: 1. Server: Hosts the shared directory. 2. Client: Mounts the shared directory over the network, making it appear as part of its local filesystem.
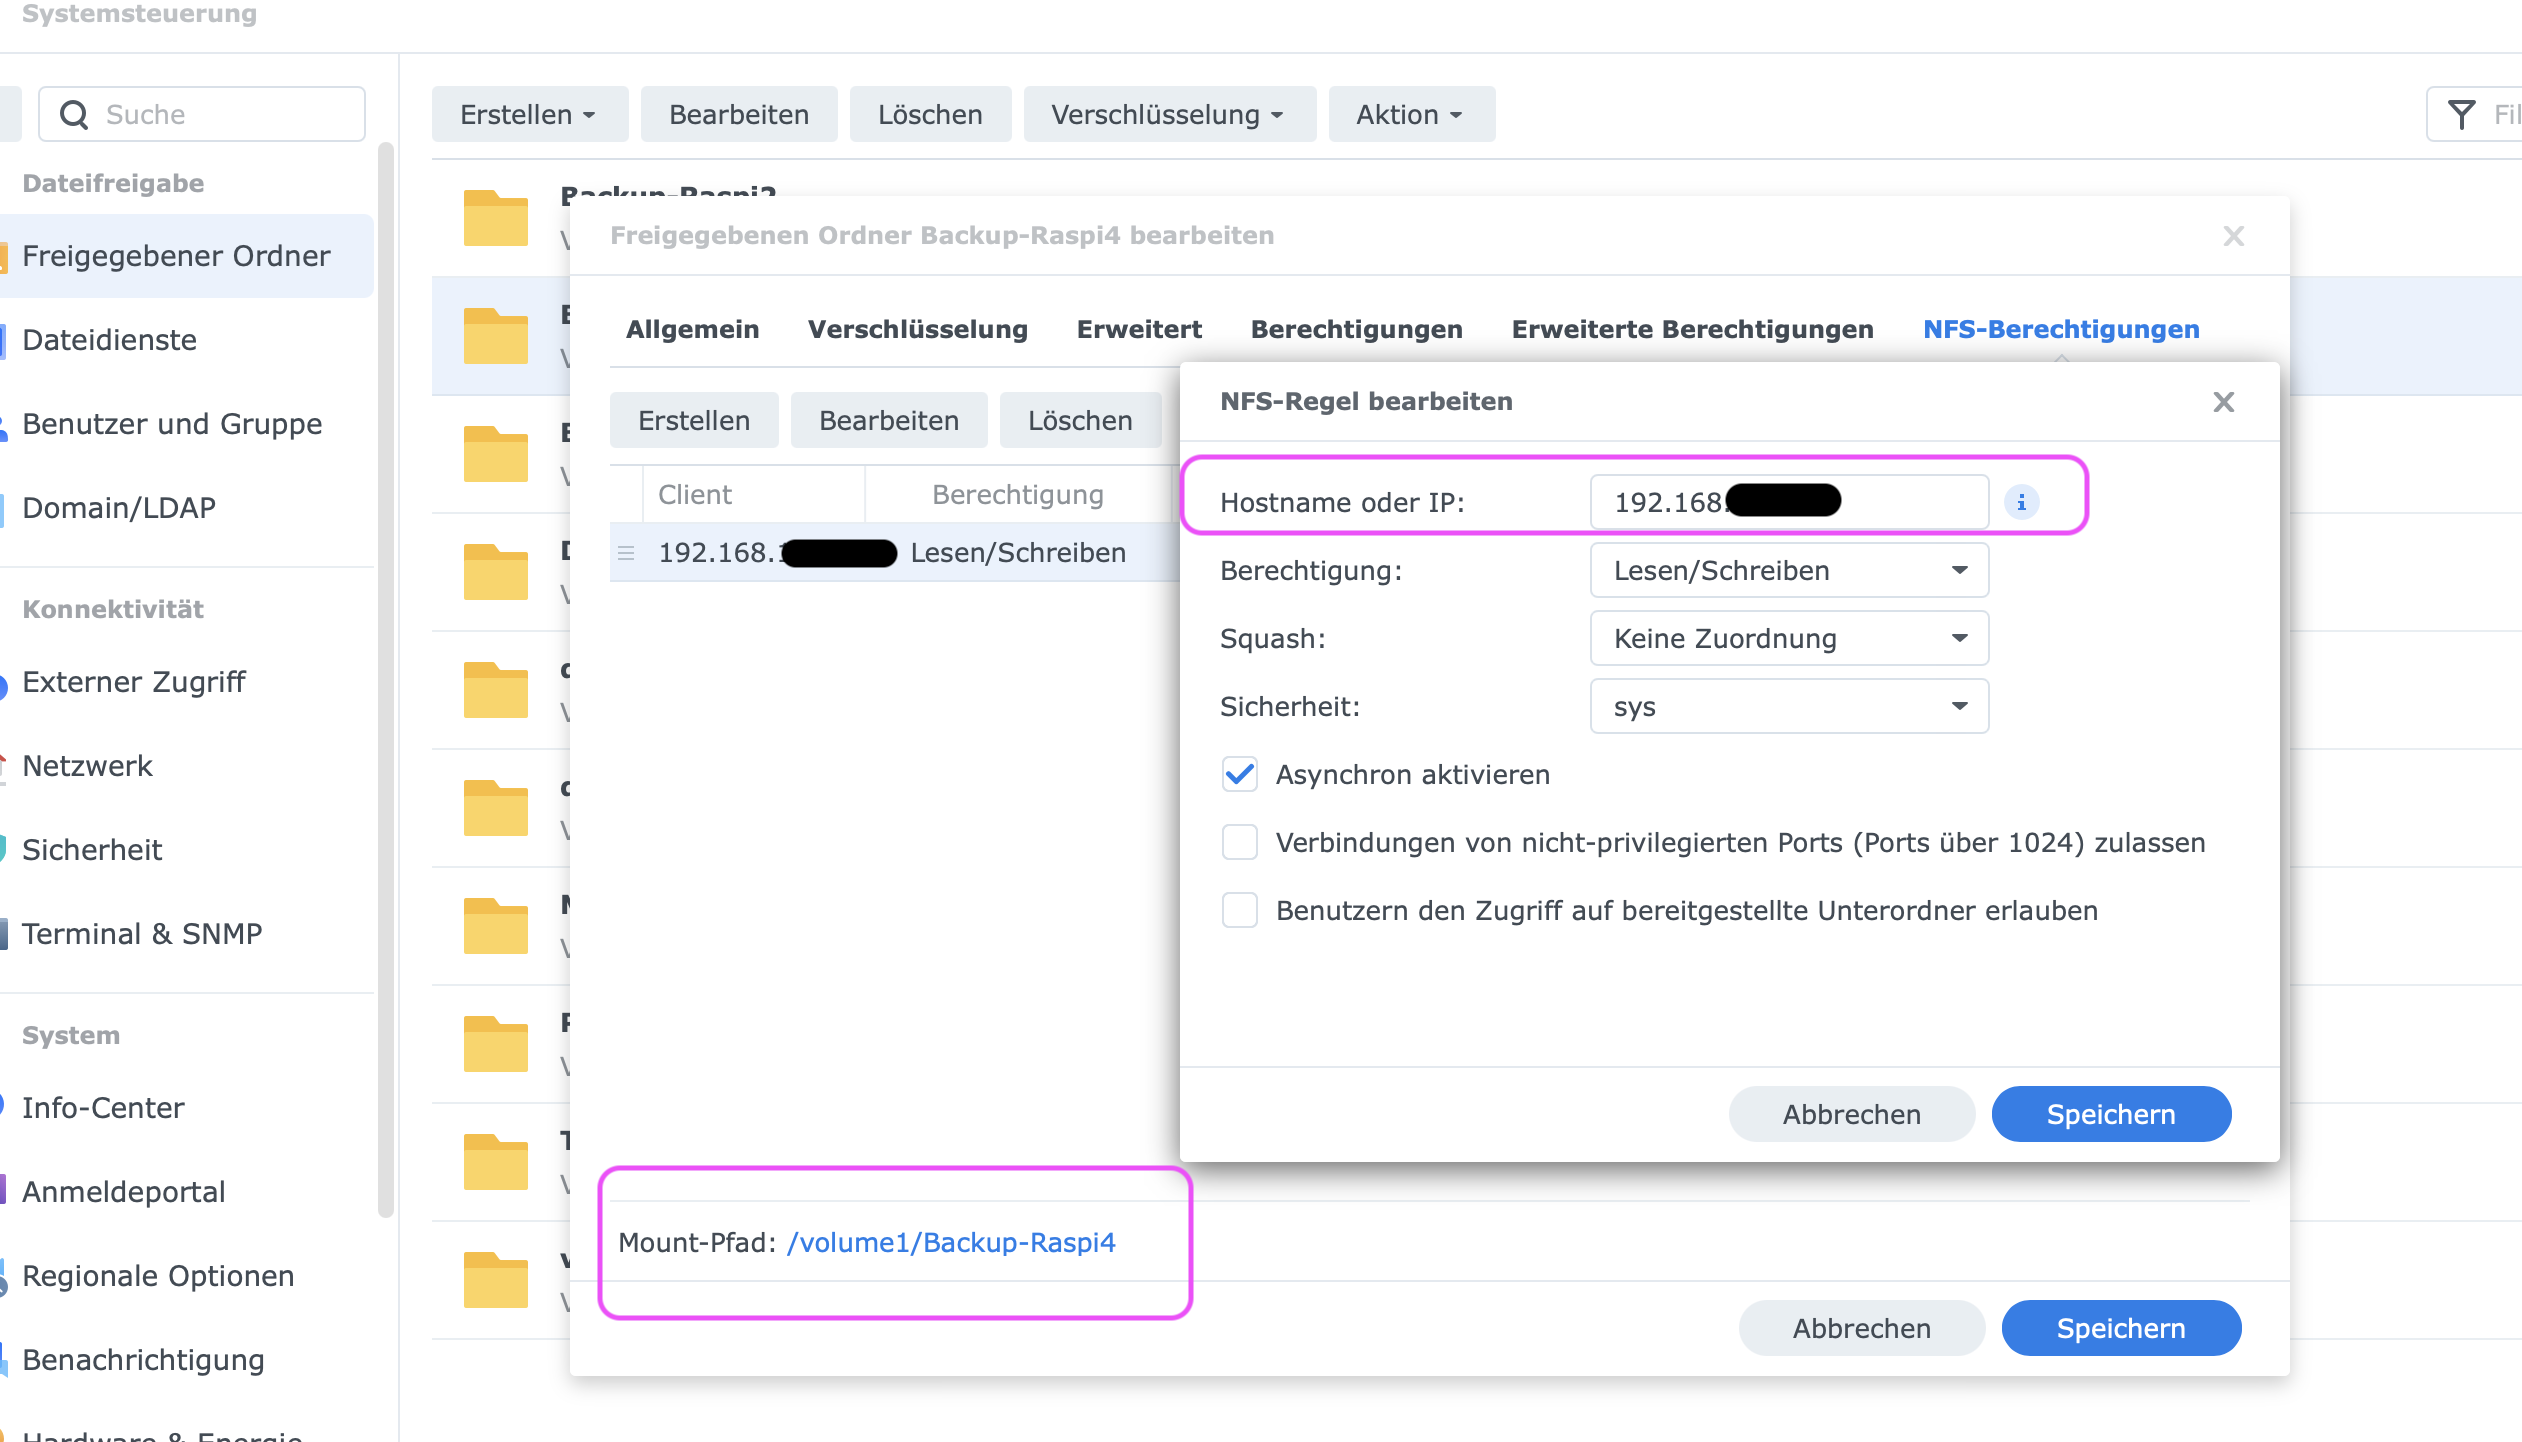
Create new share on NAS
Create your folder/share on the storage side, use NFS and enter the IP of your target system.
Mount the share
In some linux distribution is required to install a nfs client:
I will use the nfs mount as persistent mount, means i will edit the fstab file. If you're going to use mount command, the mount will not be persistent which means after a reboot you will have to mount the share again. Of course it is possible to automate this process, but it is not necessary because of fstab.
fstab
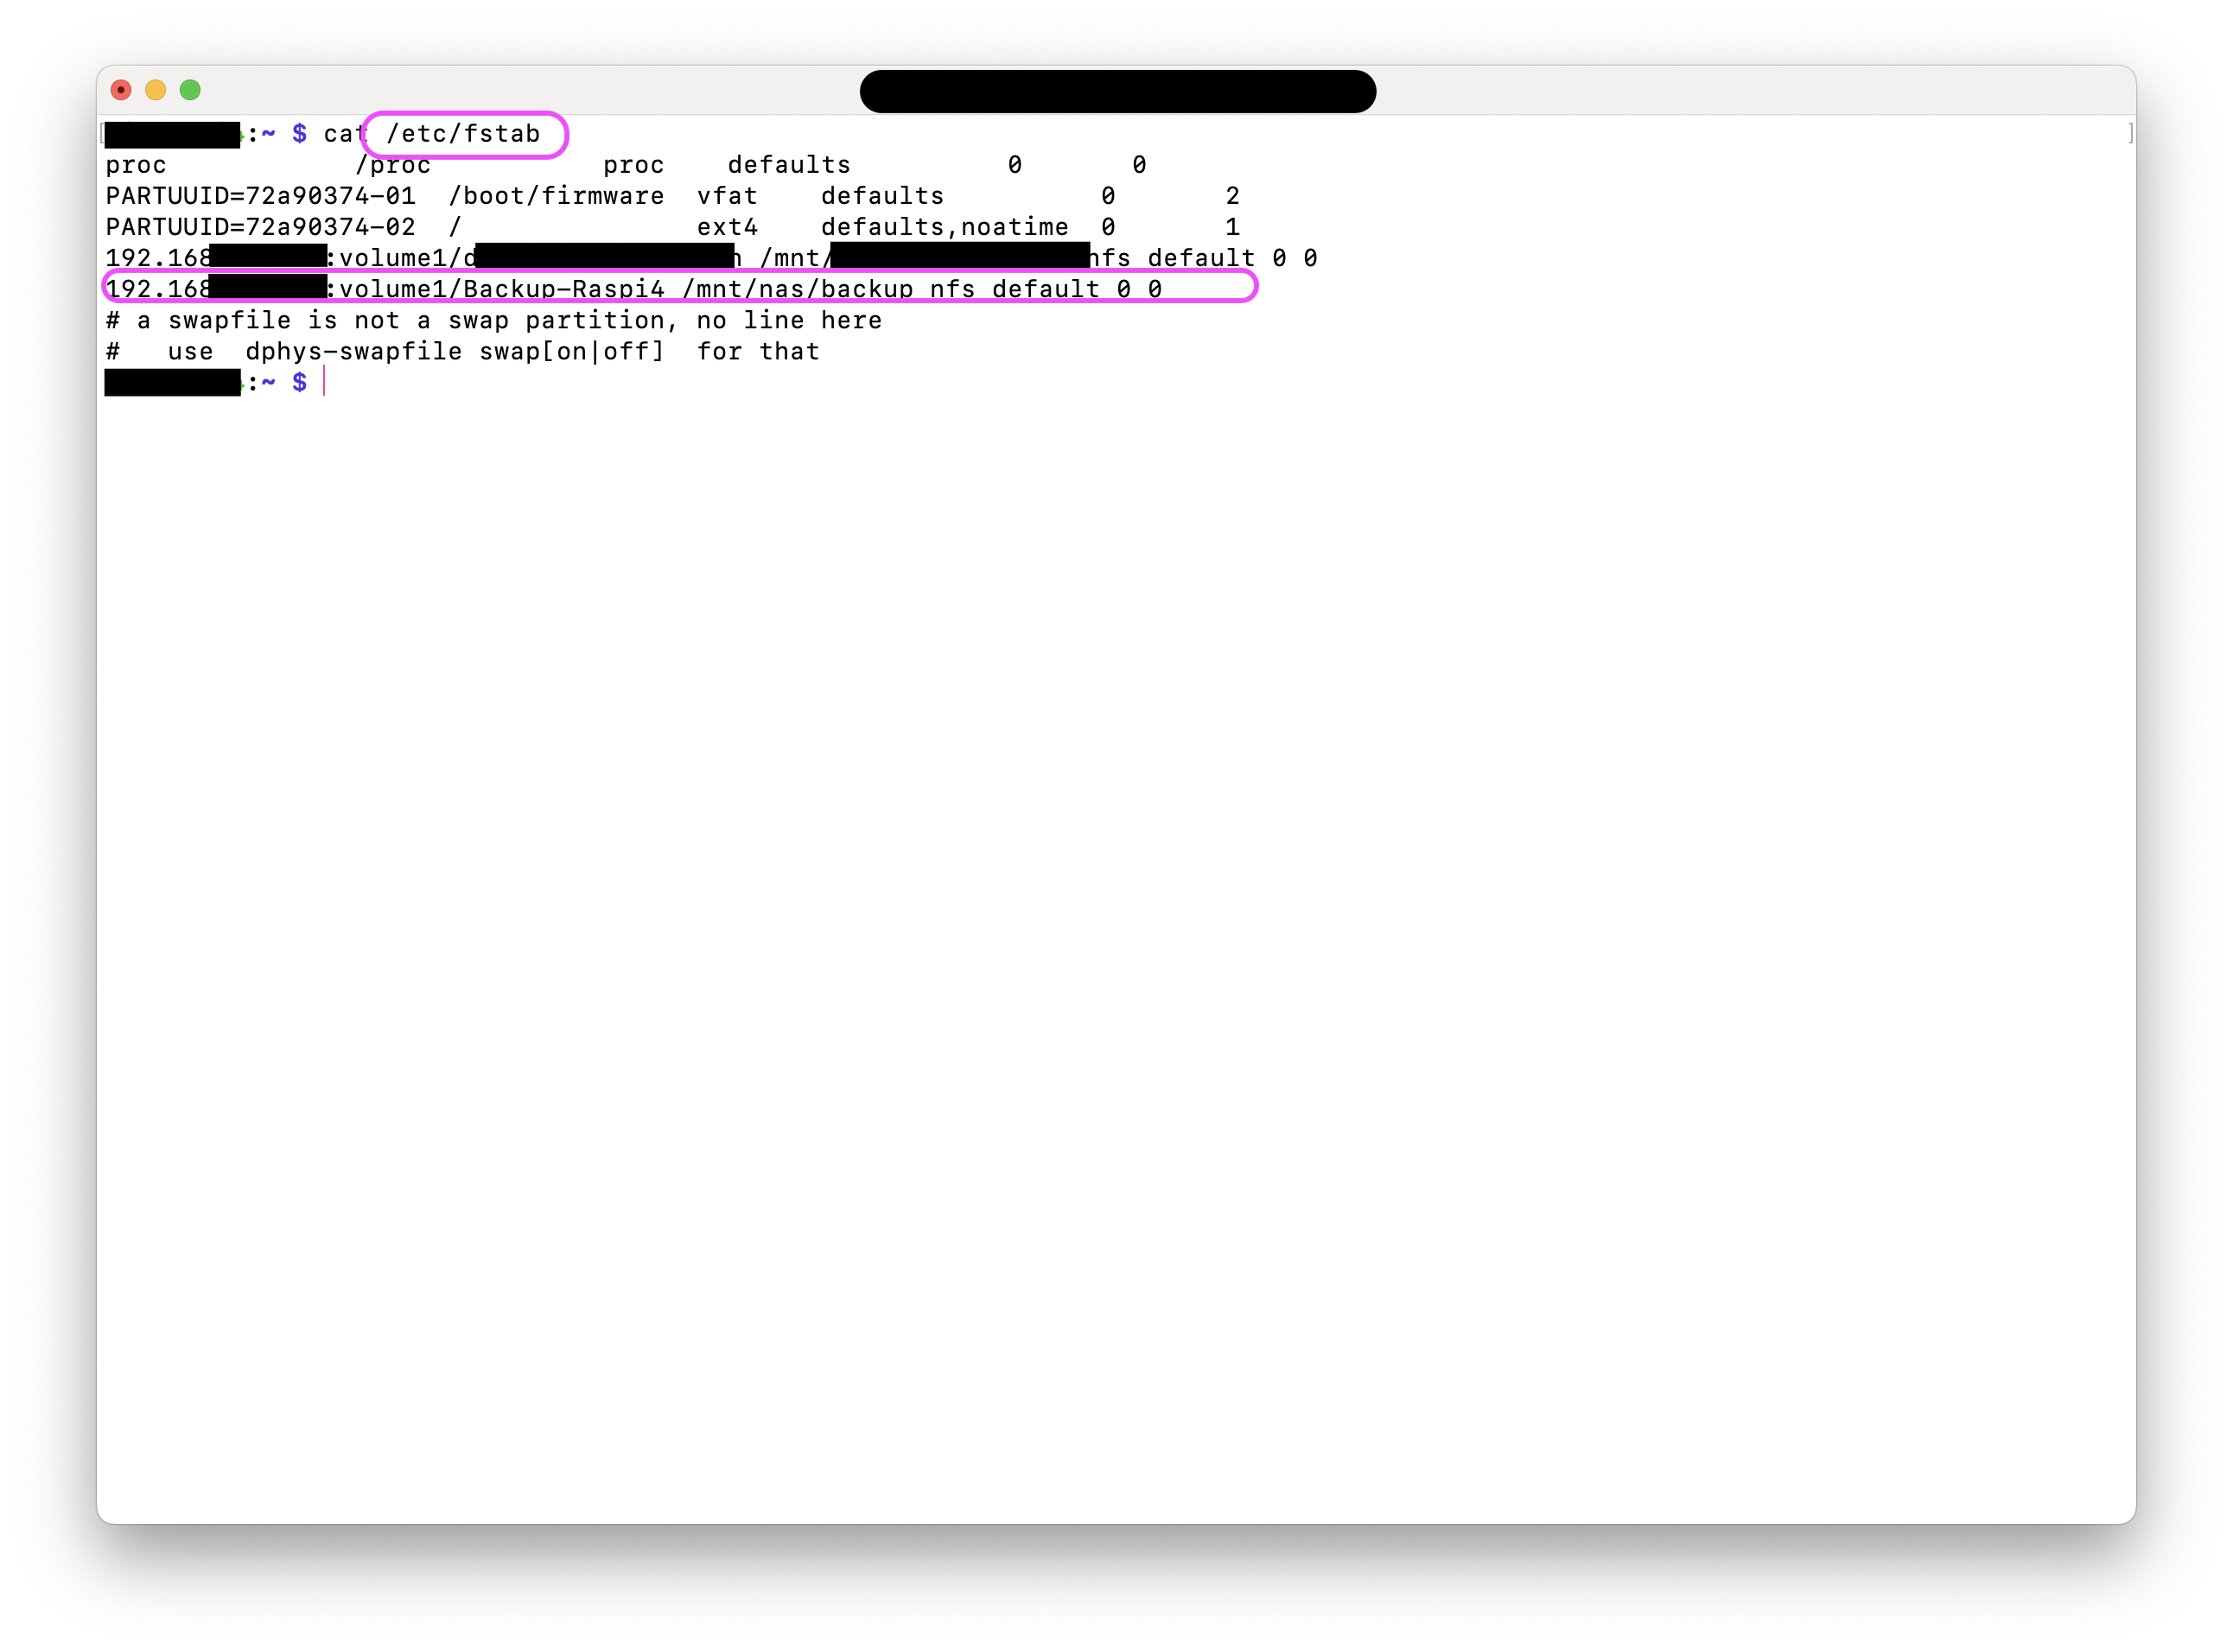
The fstab (File System Table) file is usually located at /etc/fstab. Each line in the file represents a file system.
Fields explanation:
| Field | Explanation | Example |
|---|---|---|
| Device | Source/Storage Device, this can be a block device, a UUID or a NFS | In my case the IP-Address of my NAS '192.168.X.X' and the Volume 'volume1/ Backup-Raspi4' connected with ':' |
| Mountpoint | The directory where the file system will be mounted. | /mnt/nas/backup |
| File System Type | The type of file system, such as ext4, xfs, or nfs | nfs |
| Mount options | Mount options that control the behavior of the file system, for more information you can use 'man mount' in the shell. | We use set of default options: default |
| Dump | 0/1 you can enable Dump for your specific Dump/Backup program | 0 |
| Fsck order | Check the file system through fsck when booting, not necessary in our case | 0 |
Steps
- Create a folder where you want to mount the share, you always need a local resource/folder as "jumppoint/mountpoint":
- Edit fstab, add your share as persistent drive:
Now we have to add additional line to get our share mounted:
192.168.X.X:volume1/Backup-Raspi4 /mnt/nas/Backup-Raspi4 nfs default 0 0
Replace 192.168.X.X with your NAS IP and /volume1/Backup-Raspi4 with the NFS path you configured on your NAS.
volume 1 is the default mount point of the synology for partitions.
-
Enable fstab changes, reload fstab:
-
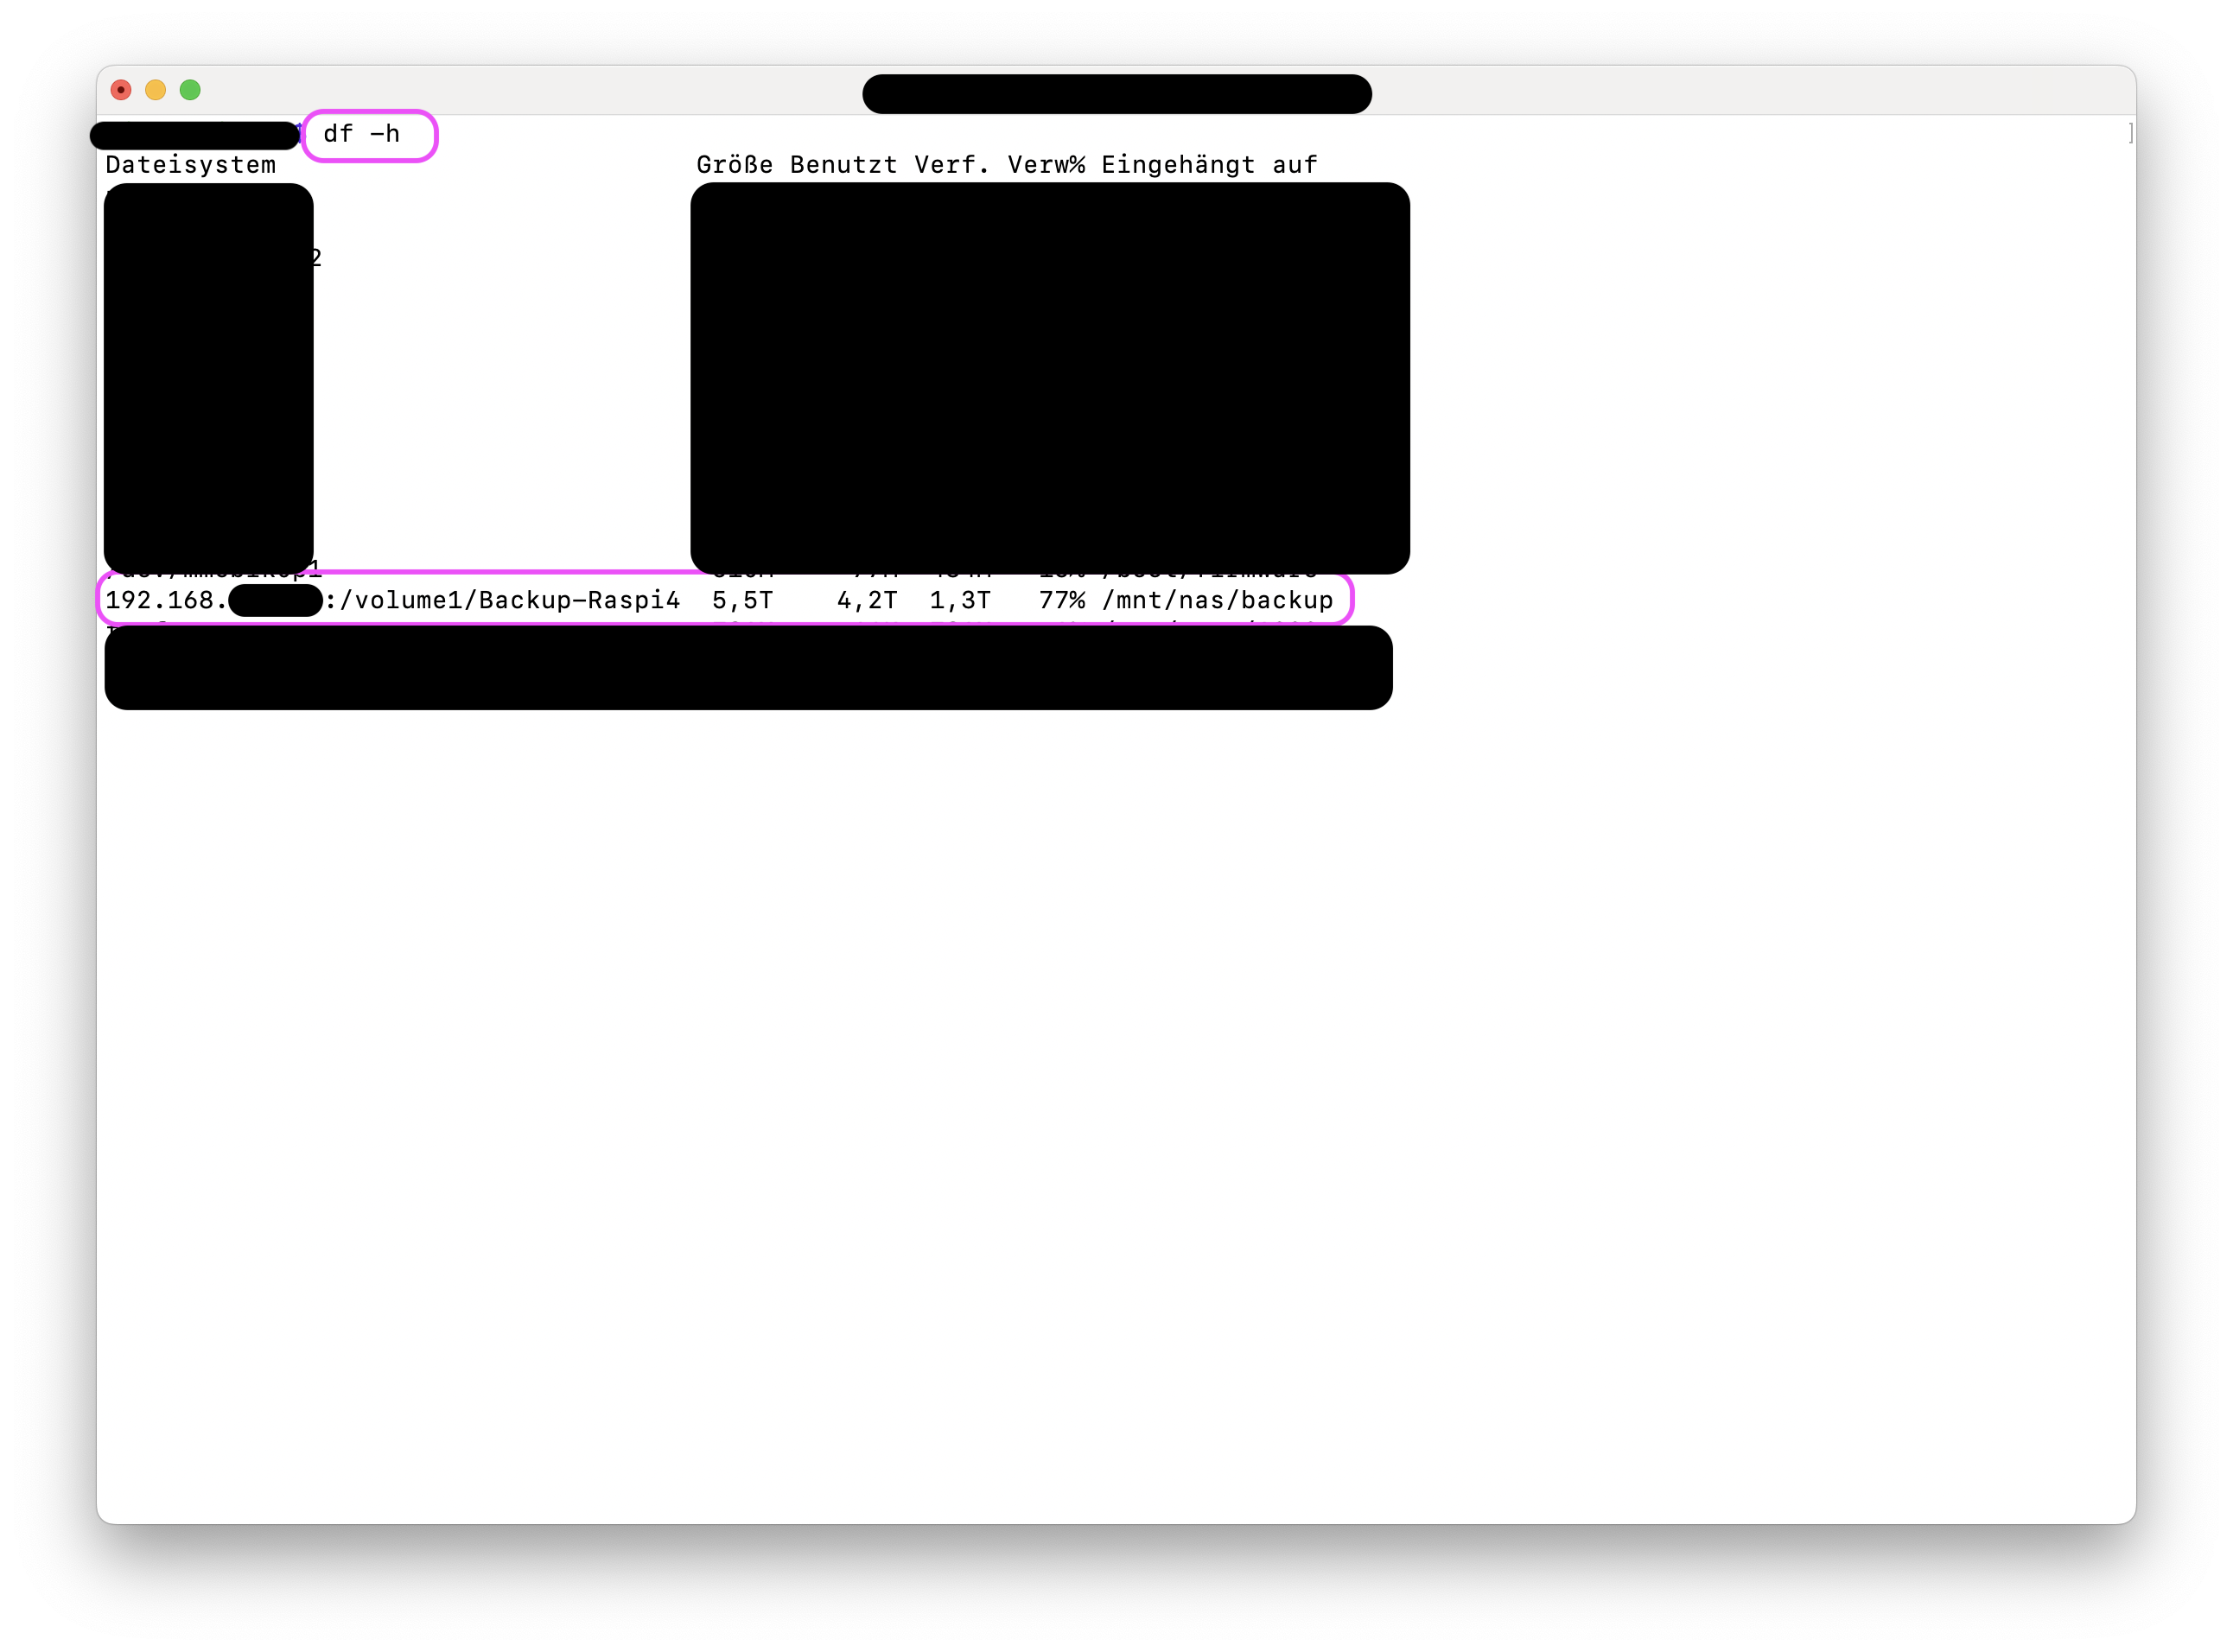
Verify the mount:
-
Test the mount:
That's it, you've mounted successfully a persistent nfs share.
Further informationen
Before editing fstab it's recommended to make a copy of it:
I would also recommend to test the mount before editing fstab:
Cheers!